Fabrics Ideal for Turkey Hunters

Turkey Hunting Fabrics and Camo Patterns - Camo Fabric Depot

Waterproof Turkey Hunting Blind Fabrics

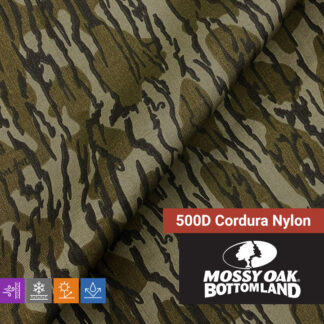
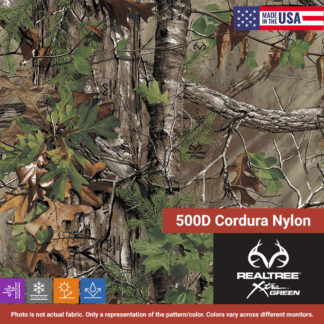
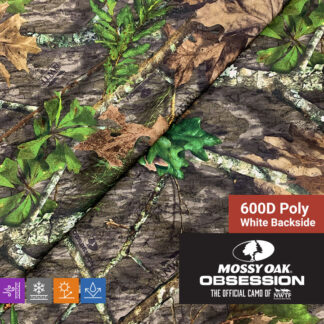
When it comes to turkey hunting fabrics we have all of the bases covered. If you are wanting to create a turkey hunting blind that keeps you shielded from the elements and invisible to the keen eyesight of the turkey, our 600D Polyester or 500D Cordura® Nylon are ideal fabrics for these types of installations. They are both waterproof and will keep you dry during those wet Spring days. Our 600D Polyester comes with the official NWTF camo pattern Mossy Oak Obsession® while our 500D Cordura® Nylon comes with the ever popular and equally effective Realtree Xtra Green® pattern. Both of these fabrics are sold by the yard and are on sale for a limited time.

Turkey Hunting Fabrics and Camo Patterns - Camo Fabric Depot

ON SALE! SAVE 10% NOW

  • Mossy Oak Original Bottomland - 500D Cordura Nylon

    500D Cordura® Nylon – Mossy Oak Original Bottomland – 60″

    $20.42 / yd
  • Realtree Xtra Green - 500D Cordura Nylon

    500D Cordura® Nylon – Realtree Xtra Green – 60″

    $20.42 / yd
  • Mossy Oak Obsession NWTF - 600D Poly Fabric

    600D Poly – Mossy Oak Obsession – Official NWTF Camo – 57/58″

    $14.65 / yd

Turkey Hunting Fabric Ideal for Apparel and Accessories

If you are wanting a great turkey hunting fabric that is extremely versatile, quiet and soft to the touch then you will want to get your hands on some CWC Twill. This fabric is great for all sorts of turkey hunting gear including apparel, bags, pouches, cases, seat covers, curtains or virtually anything that you can think of. Our CWC Twill is available in Mossy Oak Obsession and also can be purchased with Realtree APG®. This fabric is also sold by the yard and is on sale for a limited time!

Mossy Oak Obsession Fabric - Camo Fabric Depot

ON SALE! SAVE 10% NOW

  • Mossy Oak Obsession NWTF - CWC Twill

    CWC Twill – Mossy Oak Obsession – Official NWTF Camo – 58/59″

    $10.97 / yd

How to Recover a Dog Bed – Tie Blanket Style

Let's see how this goes. Recover a dog bed with fleece fabric.

Molly loves her bed. When she is ready to relax she can always be found resting in the same bed that she has had since she was a puppy. Since she really loves her bed, I didn’t want to take it away from her by buying a new one. I decided to give re-covering it with Realtree Xtra fleece fabric a try. I think that it turned out really nice and to be honest I really feel that Molly likes the bed even more than she did. The softness of the camo fleece fabric makes what was turning into an old, ugly looking dog bed into a new, softer experience for her. Here are the steps I took making this DIY dog bed.

Step 1: Purchase Camo Fabric

Purchase Camo Fleece FabricThe first thing you need to do obviously is to purchase some fleece fabric. I love the vibrant colors of our camo fabric and extremely soft feel of our fleece so it was a no-brainer to go with one of our great fleeces. The size of your dog’s bed will determine how much fabric you will need. Below is a list of some of our available fleece fabric.

  • Mossy Oak Break Up Camo Fleece

    Fleece – Mossy Oak Break-Up – 58/60″

    $15.45 / yd
  • Realtree AP Camo Fleece

    Fleece – Realtree AP -58/60″

    $15.45 / yd

Step 2: Measure and Cut

Measure & Cut FabricMeasure & Cut FabricTo measure Molly’s bed I folded the fabric over to create two layers. You want the two layers to be the same size so that you can cut the tie fringes evenly. Be sure to have the inner-side of the fabric facing upwards so that when you mark it with a Sharpie it’s not on the outside portion of the fleece fabric. Outline the bed leaving around 6 inches of room on the outside for the fringes and thickness of the bed. This can be adjusted smaller or bigger depending on the size of the dog bed. Once you have it marked with a Sharpie cut the fabric along the mark you just made. I found it easy to cut using a rotary cutter that I found at my local fabric store.

Step 3: Cut Fringes for Tying

Cut FringesCut FringesYou can cut the fringes to whatever length you want but I found that 3-4 inch long fringes look really nice. Using the rotary cutter, simply go around your two layers of fleece fabric and cut the fringes to even length and width. Since I was cutting the fringes on my floor I used a self-healing mat that I moved along the edge of the fabric to cut on. This saves damage to the floor as well as saves the sharpness of the cutting blade.

Step 4: Tie the Fabric Around the Dog Bed

Tie Fringe EdgesThe last step is to tie the two layers of fabric around the existing dog bed. Lay the dog bed in between the two pieces of fabric that you just cut the fringes on. Be sure to make sure that the outside of the fabric is facing toward the outside on both the bottom and top. (You will be able to tell because the fabric is brighter and more vibrant on the print side.) Start tying. The knot is a simple knot to secure the fabric. I tied every other fringe to give it a more”fringy” look.